Submit a new project
Create a project and take it through the six steps of the intake wizard. Nothing reaches the engineering firm until you press Submit Intake.
Before you start
Have these to hand. The wizard will not let you submit without them.
- Your own reference number for the job.
- The customer’s name and the property address.
- The wall height and soil height, in feet.
- The scope of work: which products, which brand, and how many.
- The inspection form, a sketch or floor plan, the signed contract, and at least one site picture.
If you do not see New Project on Projects, your engineering firm has turned it off for your company. See If you have no New Project button.
Create the project
- Open Projects and press New Project. The Create New Project box opens.
- If your company has more than one kind of project, choose the Project Type.
- Choose how to begin: Extract from PDF or Manual Entry. Both are explained below.
- Set the Requested Due Date. Press Next Available to take the first open date, or pick one yourself.
- Type your Internal Reference #.
- Tick Engineer Inspection Required? if the job needs the engineer to issue an inspection report after the work is installed. Tick Add Calculations if the job needs calculations. Structra can tick both for you. See The calculations address check.
- Press Create Project.
Structra gives the project a job number and opens the intake wizard, titled Project Intake with that number.
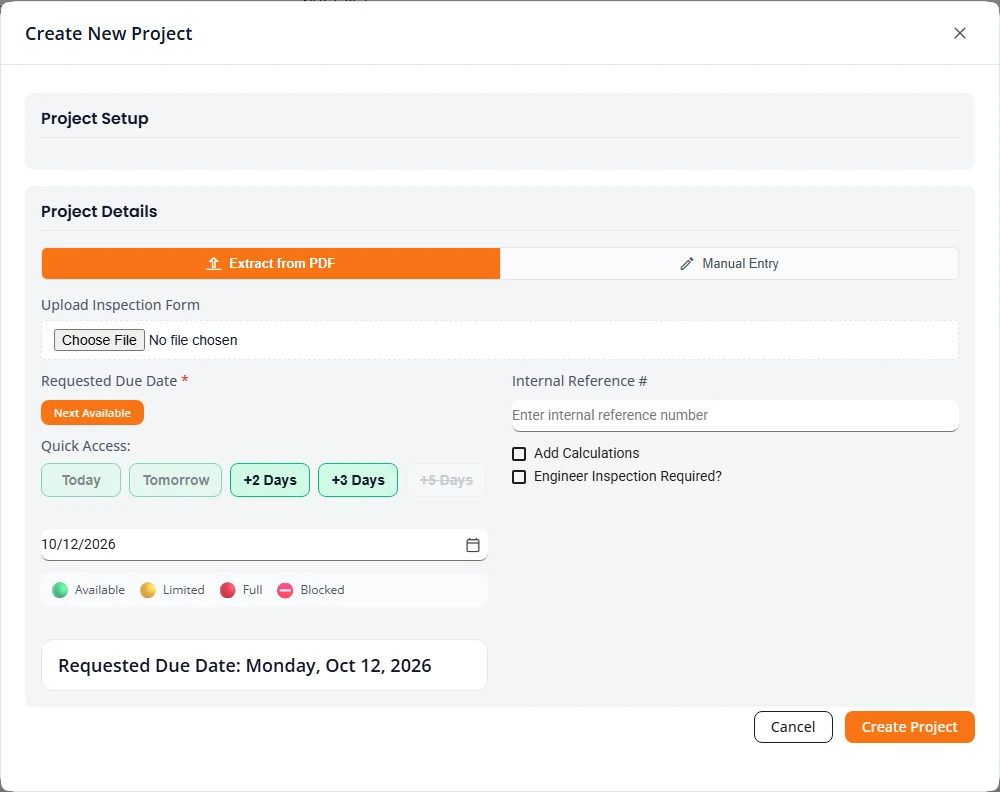
Extract from PDF
Under Upload Inspection Form, choose the inspection form PDF. Structra reads it and shows an Extracted Data Summary: the customer, address, property and foundation details, heights, scope and notes it found. That data is saved with the project when you press Create Project, and the PDF is filed as the project’s inspection form. You then check each step in the wizard instead of typing it.
Manual Entry
Choose Manual Entry if you have no form to read, or if Structra says it could not extract data from the file. You set the due date and reference here, and type everything else in the wizard.
An Ad Hoc job
Some firms let you start Ad Hoc jobs: one-off engineering work described in your own words. If yours does, Ad Hoc is in the Project Type list. It has no inspection form and no six-step wizard.
- Press New Project and choose Ad Hoc under Project Type.
- Under Project Details, set the Requested Due Date and your reference, and type the Customer Name and Property Address.
- Under Scope & Fee, describe the work in Scope description. You do not enter a fee: the engineering office sets it when they review the job.
- Press Create Project.
If you do not see Ad Hoc, your firm has not opened it to clients. Ask them.
The calculations address check
Some cities require engineering calculations before they issue a permit. Structra looks up the property address, works out which city’s limits it sits inside, and tells you when that city requires calculations. One city is set up: Kansas City, Missouri.
- Extract from PDF. After the inspection form is read, if the address is inside the limits, Add Calculations and Engineer Inspection Required? are ticked for you. A note under them reads This address is inside Kansas City, Missouri city limits, where calculations are required. Add Calculations is on.
- If you untick it. The note turns into a warning: This address is inside Kansas City, Missouri city limits, where calculations are required, but Add Calculations is off. You can still press Create Project.
- Manual Entry. There is no address on that screen, so nothing is checked there. The check runs in the wizard once you have entered the address.
- Review & Submit. If the address is inside the limits and Calculations Needed is not ticked, a warning titled Calculations are required at this address sits at the top of the step. Press Go to Project Info in the warning to tick the box.
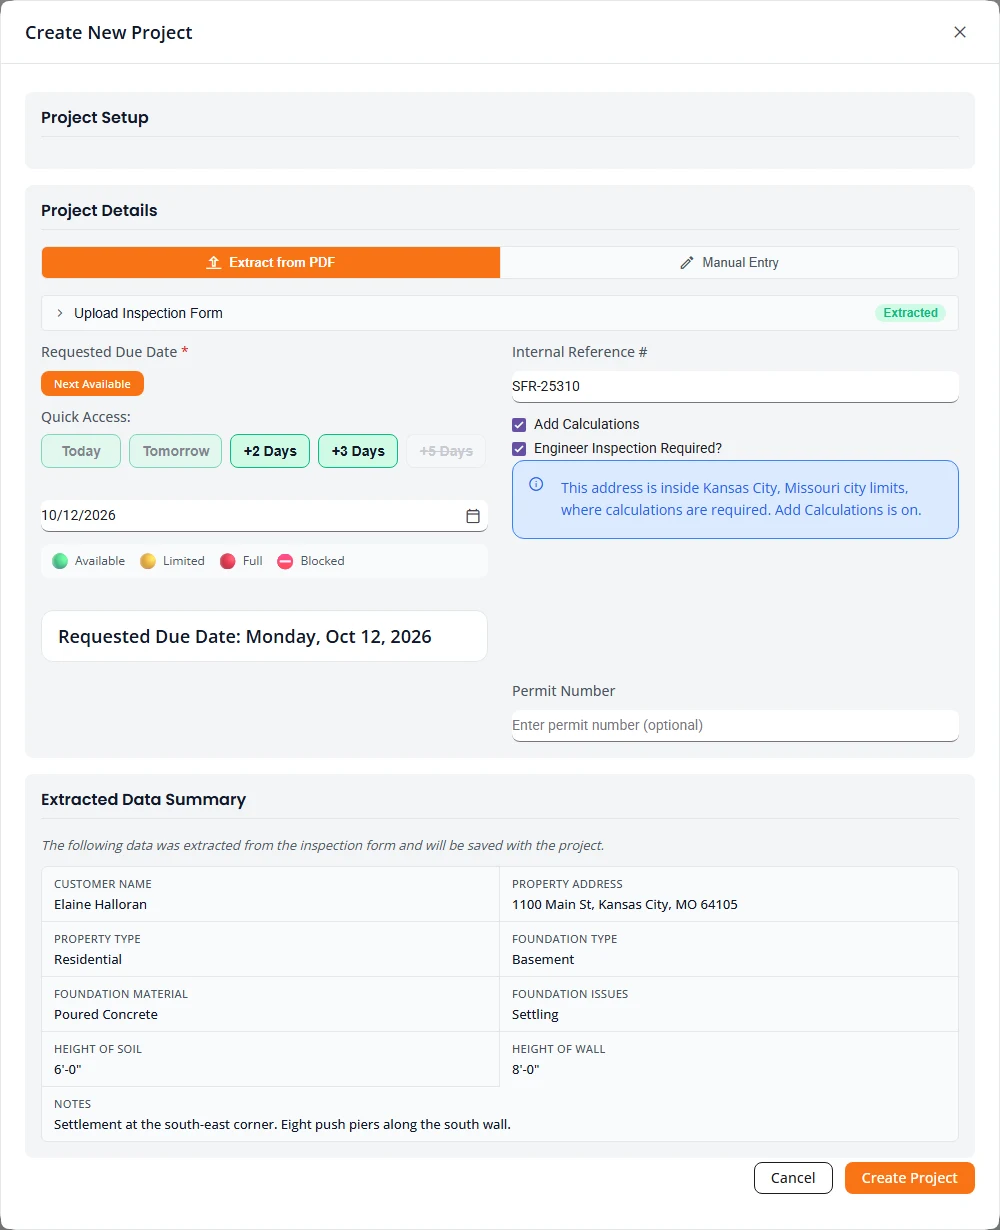
Choose a due date
The due date is a request. The engineering firm confirms the team and the schedule when it approves the project.
- Quick buttons. Today, Tomorrow, +2 Days, +3 Days and +5 Days pick a date in one press. A button that is greyed out is not available.
- Calendar. Select the calendar icon to pick any other date. Days you cannot choose are greyed out.
- Next Available. On the Create New Project box, this finds the first date the firm can take work and selects it.
The Create New Project box opens on a date you can take. If the usual date is a weekend, a holiday or a full day, it moves to the next open day.
Why a date may be unavailable
| Reason | What it means |
|---|---|
| Too soon | You cannot ask for today. Before midday the earliest date is tomorrow. From midday on, it is the day after tomorrow. |
| Weekend | The firm does not take due dates on Saturdays or Sundays, if it has set that rule. |
| Holiday | The firm has marked the day as a holiday. |
| Capacity | The firm has no room left that day. |
The legend under the date field shows the four states: Available, Limited, Full and Blocked.
Rush jobs
A day that is Full cannot be chosen. If one is already selected, Structra says “This date is fully booked. Choose another date, or contact the engineering office if it is urgent.” You can ask the firm to take the job on that day as a rush job. Whether they accept is up to them, and rush jobs carry an upcharge.
Step 1: Project Info
The wizard opens on this step, filled in with what you chose when you created the project.
- Internal Reference # is required. It is the number your own office uses for the job, and it shows in the Ref column on Projects.
- Requested Due Date shows the date you chose on the Create New Project box, with how many slots the firm has left that day. You cannot change it here. If the date needs to move, ask the firm to change it.
- You can change the date here in two cases: the project has no due date yet, or the date you chose is now too soon, for example because it has passed. Then the quick buttons and the calendar appear, and the date is required. It follows the same rules as above.
- Calculations Needed tells the firm the job needs calculations. Structra warns you on Review & Submit if the address is in a city that requires them and this is not ticked. See The calculations address check.
- Engineer Inspection Required adds an inspection stage after the design. When it is ticked, a Permit Number field appears. You can leave it empty and add the number later.
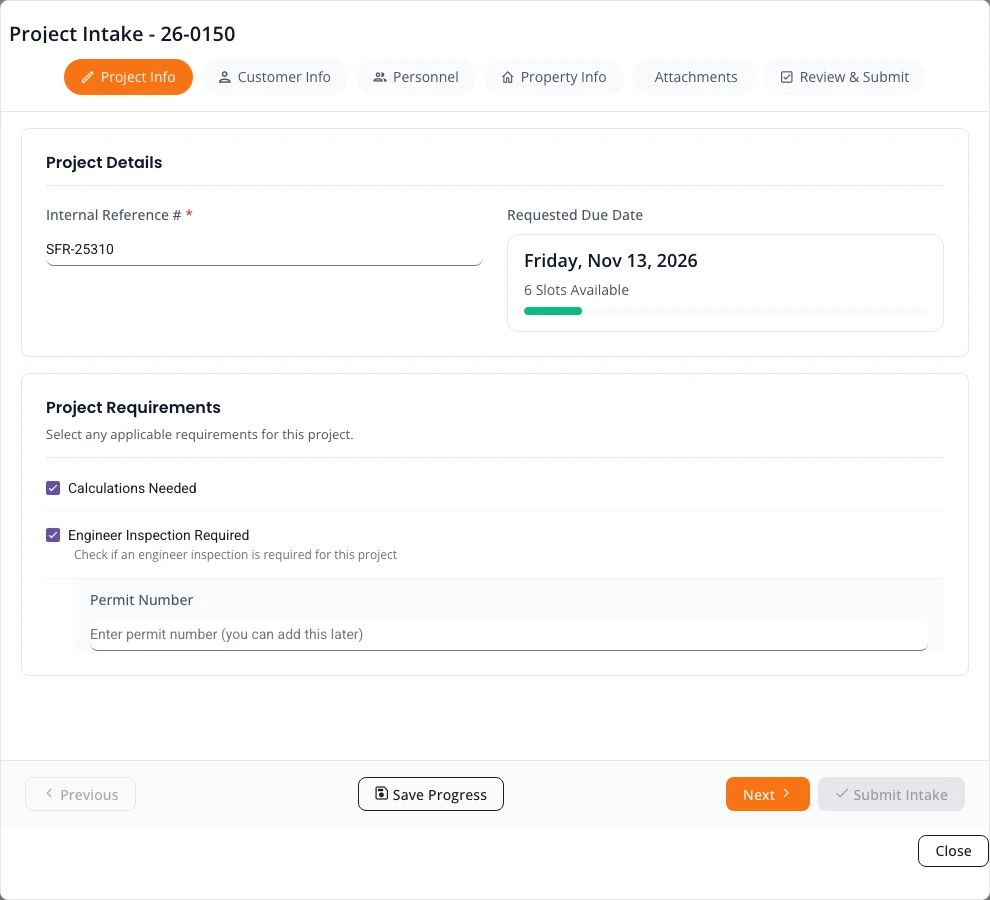
Review & Submit shows these choices as Due Date, Calculations and Inspection.
Step 2: Customer Info
- Type the Customer Name. This is the property owner.
- Start typing the Property Address. After three characters a list of matching addresses appears.
- Select the right address in the list. Structra fills in the full address with the city, state and ZIP code.
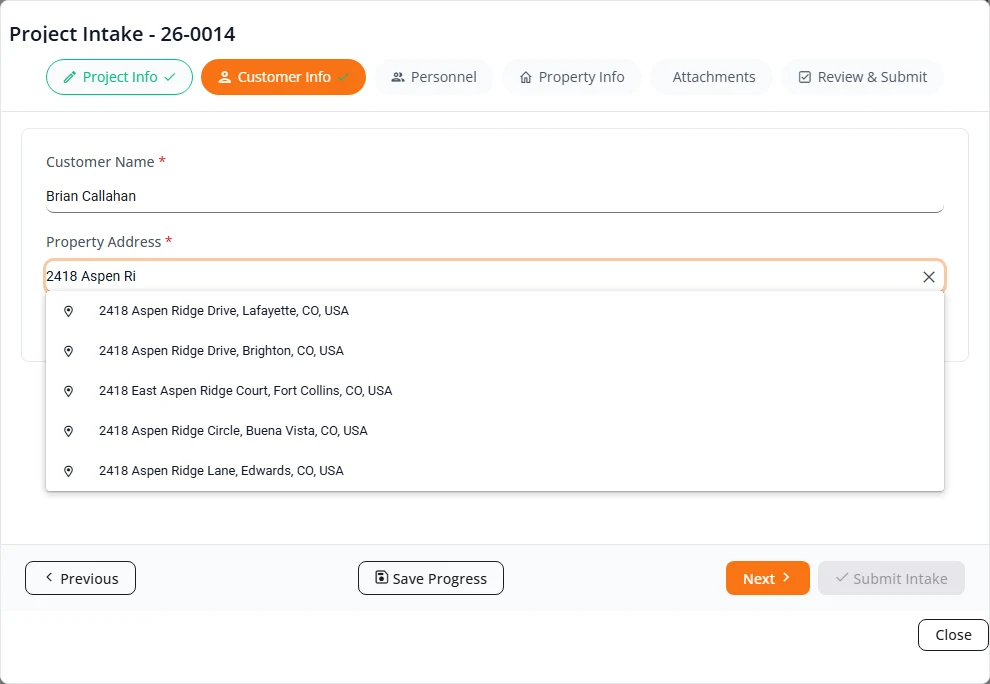
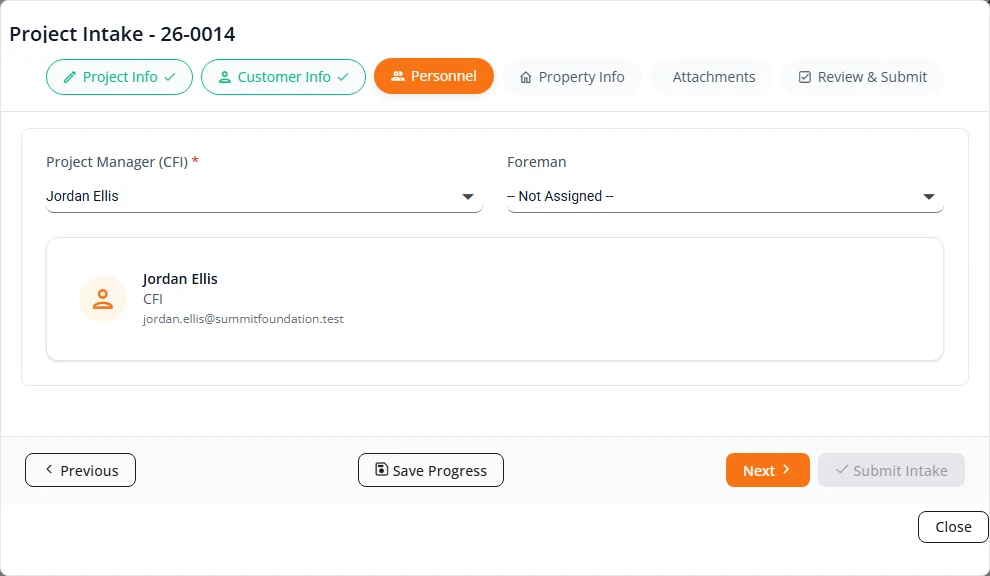
Step 3: Personnel
- Project Manager (CFI) is required. Choose the person at your company who owns this job. If the firm pushes the project back, this person is emailed along with your Client Admins.
- Foreman is optional here. It is needed later if the project has an inspection stage.
If the person is not in the list, choose + Add New CFI or + Add New Foreman at the top of the list and fill in the short form. The Role is already set. Type the First Name and Last Name and press Create User.
- For a project manager, Email is optional. Leave it empty for someone who never signs in.
- For a foreman, Email is required. Inspection reminders are emailed to the foreman.
Who you can add depends on your own role, and the Role list shows only the roles you may add. A Client Admin sees every role. An Office user sees CFI, Sales, Foreman and Inspector.
Step 4: Property Info
This step has two parts: the property, then the scope of work.
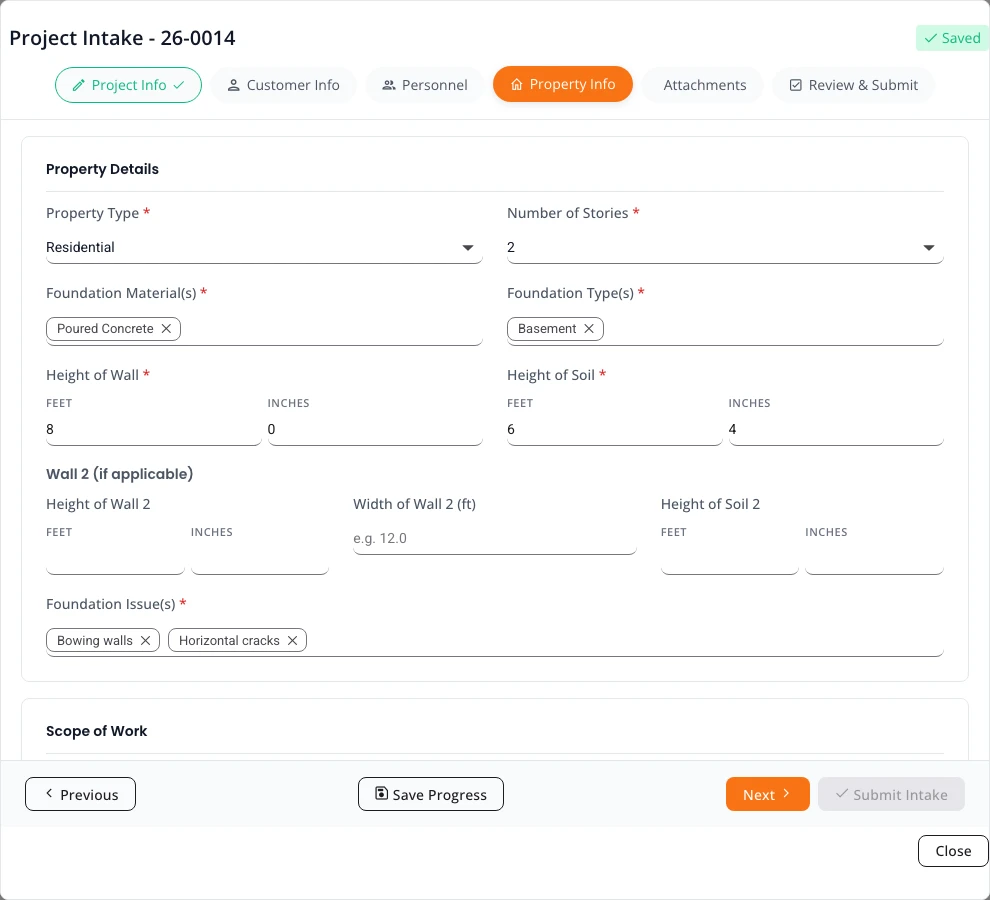
Property Details
| Field | Required | What to enter |
|---|---|---|
| Property Type | Yes | Residential or Commercial. For a commercial property you can also tick Check if plans are available. |
| Number of Stories | Yes | 1 to 5. |
| Foundation Material(s) | Yes | One or more of Poured Concrete, CMU Block, Stacked stone, Brick, Wood. |
| Foundation Type(s) | Yes | One or more of Basement, Crawlspace, Shallow Foundation, Slab on grade, Porch. |
| Height of Wall | Yes | The wall height, in a Feet box and an Inches box. For 8 feet 4 inches, type 8 and 4. |
| Height of Soil | Yes | The height of soil against the wall, in feet and inches. |
| Wall 2 (if applicable) | No | Height and soil height of a second wall, in feet and inches, and its width in feet. |
| Foundation Issue(s) | Yes | One or more of Bowing walls, Diagonal cracks, Horizontal cracks, Leaning walls, Sagging (Floors, Beams, Joists), Settling, Spalling, Vertical cracks. |
Scope of Work
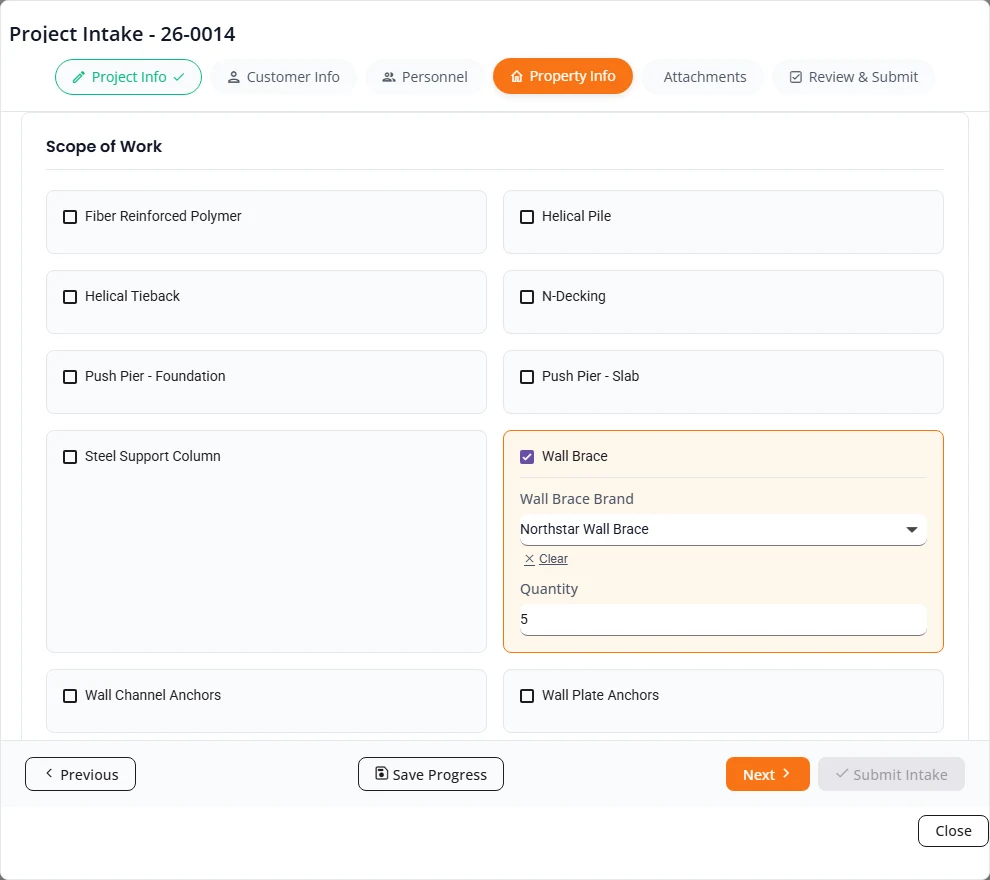
The list shows the kinds of work your engineering firm designs, such as Wall Brace, Push Pier or Helical Pile. Select at least one.
- Tick each kind of work that is in the contract.
- Choose the brand, for example under Wall Brace Brand. The list holds the brands the firm has set up for your company.
- Type the Quantity. It must be at least 1.
Steel Support Column also asks for the Beam Type (Select all that apply). If you choose Modification or Replacement, it then asks for the Main Beam Material and its size.
Step 5: Attachments
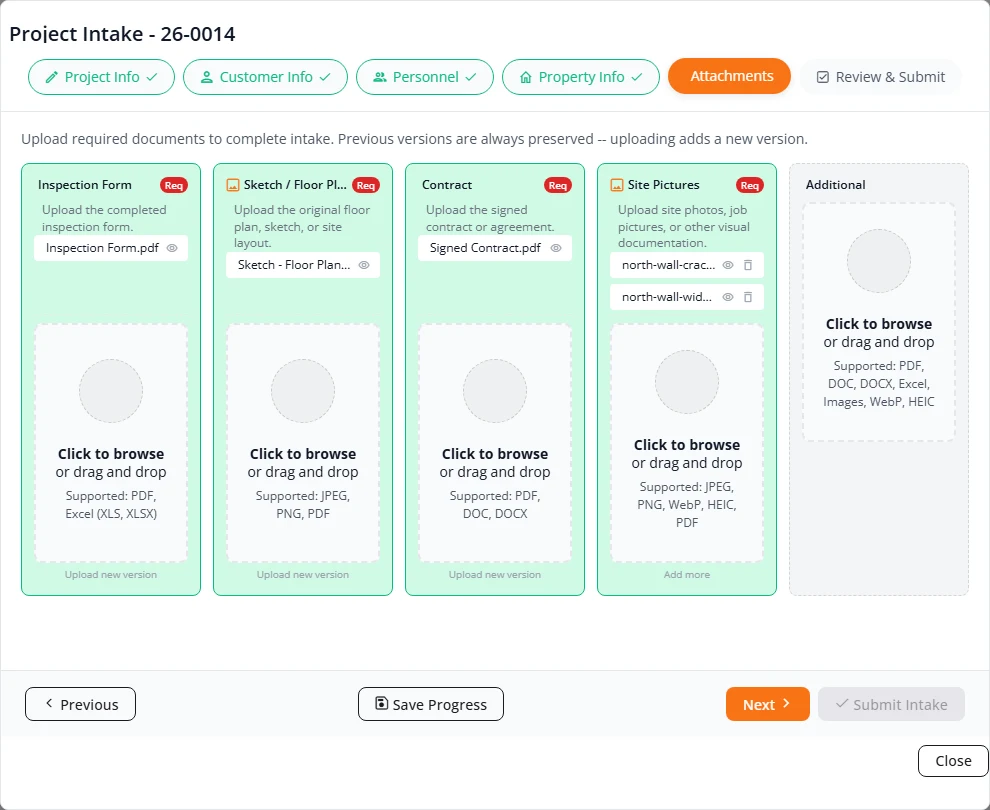
Each kind of document has its own slot. Select a slot to browse for a file, or drag the file onto it. The upload starts straight away, and the slot turns green when it is done.
| Slot | Required | What to upload |
|---|---|---|
| Inspection Form | Yes | The completed inspection form, as a PDF. |
| Sketch / Floor Plan | Yes | The floor plan, sketch or site layout. PDF, JPEG or PNG. |
| Contract | Yes | The signed contract or agreement, as a PDF. |
| Site Pictures | Yes, at least one | Site and job photos. You can add several at once. |
| Additional | No | Anything else the engineer should see. |
- Select the eye beside a file to preview it.
- To replace a document, upload again in the same slot under Upload new version. The newest file is used and the older ones are kept.
- In Site Pictures and Additional, use Add more to add files and the bin to remove one.
Step 6: Review & Submit
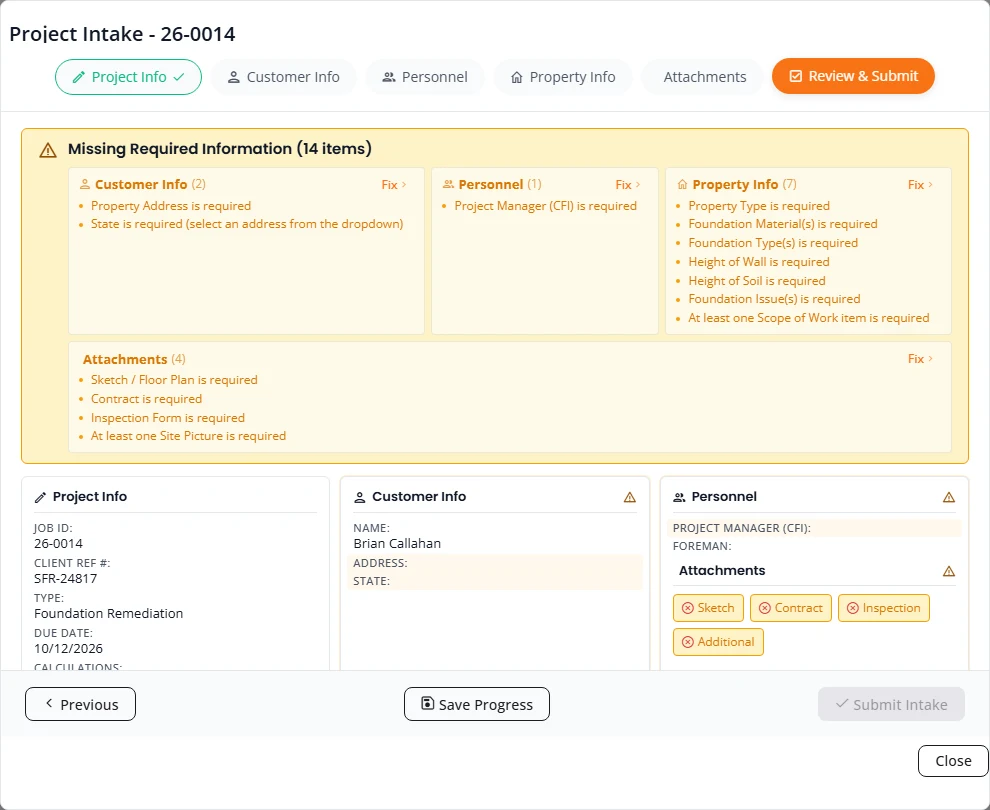
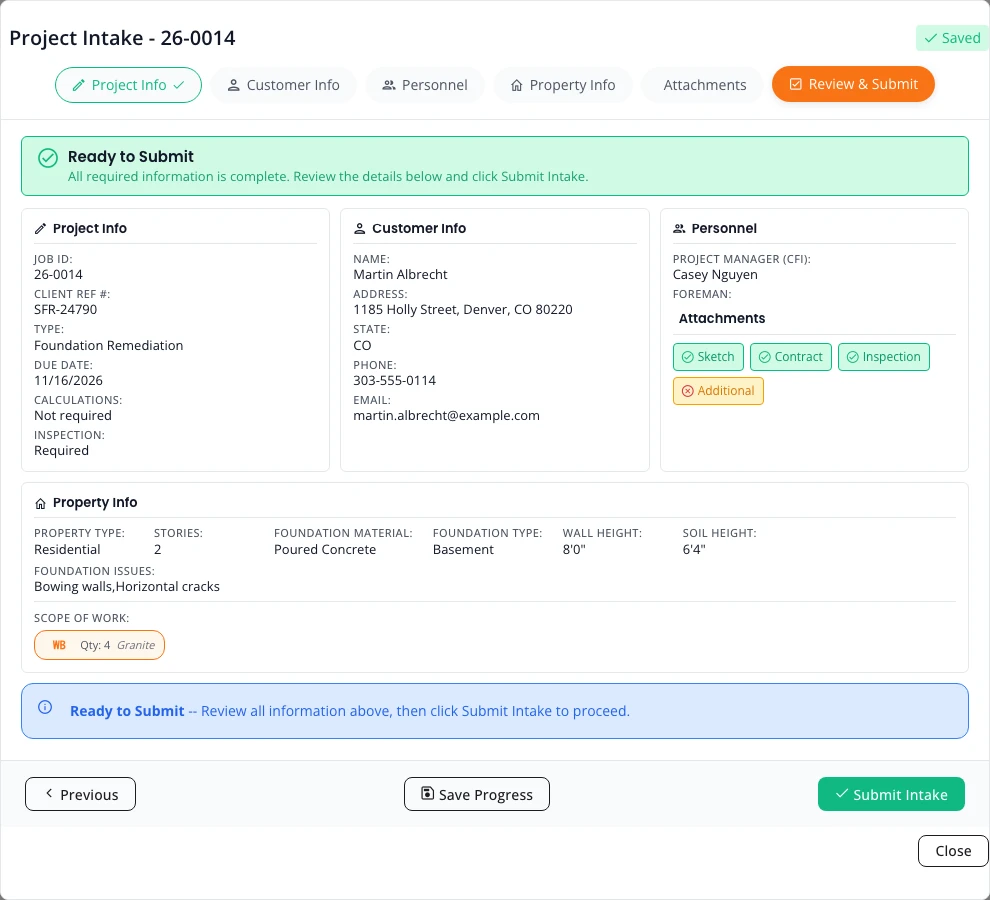
This step checks every other step and shows the whole project on one screen. Submit Intake stays greyed out until nothing is missing.
- If you see Missing Required Information, read the list. It is grouped by step. Press Fix beside a group to go to that step.
- When the banner says Ready to Submit, read the summary: project info, customer, personnel, attachments, property and scope.
- Press Submit Intake.
The wizard closes and the project moves to the Triage tab as Ready for Triage Review. What happens next is in After you submit.
Saving, drafts and coming back
- The wizard saves as you go. A moment after you change a field, the header shows Saving... and then Saved. Uploads are saved as soon as they finish.
- Save Progress saves the step you are on straight away.
- Move freely. Use Previous and Next, or select any step at the top. You do not have to go in order.
- Leaving a step saves it first. Next, a step at the top and Close each save what is on the step before they move on, so a change you made a moment earlier is not lost. If the save fails, the step stays open and Structra asks you to try again.
- Close leaves the wizard without submitting. The project stays on your Intake tab as Project Intake Initiated, with everything you entered.
- Come back. On Projects, open the three-dot menu on the row and choose Complete Project Intake. Anyone in your office can pick up a draft a colleague started.
When a field inspector starts the project
A field inspector can start the intake on site from the inspector portal. See the guide for field inspectors for their side.
- The inspector submits. Your Client Admins get an email called “New CFI Submission” with the customer’s name.
- The project appears on your Intake tab as Project Intake Initiated.
- Open the three-dot menu and choose Complete Project Intake. The wizard header shows who submitted it and when.
- Check each step. The inspector’s answers are already there. Add what is missing. The Review & Submit step lists it.
- Press Submit Intake.
Stuck on something? Email [email protected] and tell us what you were trying to do.